

Advance Payment and Checkout Process
This guide outlines how to manage advance payments and perform a checkout for a completed booking within the platform.
Advance Payment
Advance payments are required to confirm a booking. Additional payments can also be made at any time before the event concludes.
Steps to Add an Advance Payment
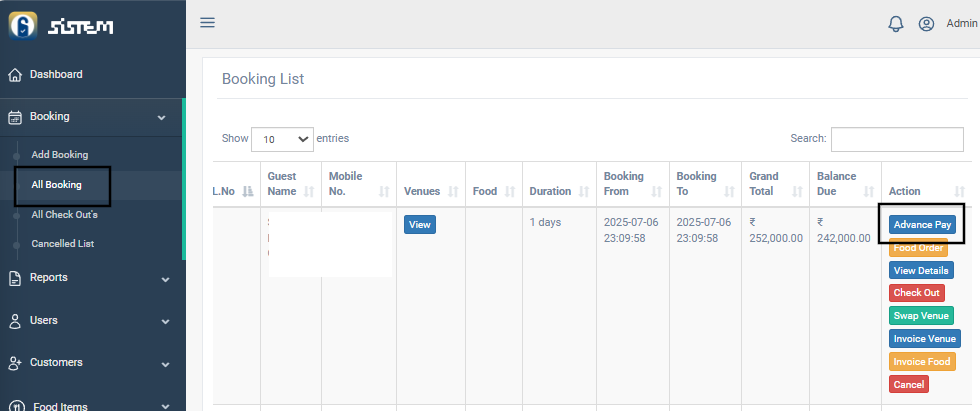
- Navigate to the Booking
- Go to the “All Bookings” section.
- Find the relevant booking and click on the “Advance Pay” button in the Actions column.
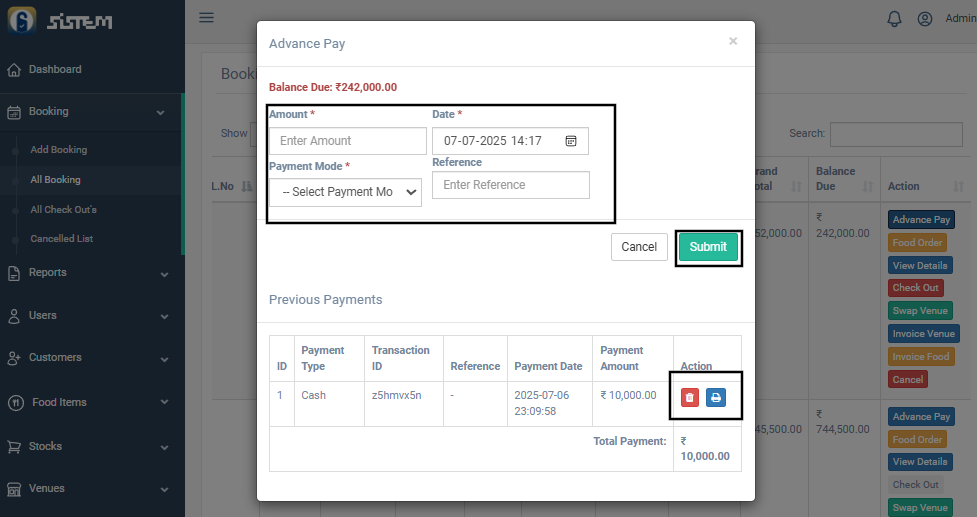
- Fill Payment Details
- A pop-up form will appear.
- Enter the following:
- Amount to be paid
- Payment Date
- Payment Mode (e.g., UPI, cash, card)
- Reference Notes (optional)
- Submit the Payment
- Click “Submit” to record the payment.
- The payment will be listed in the Previous Payments Table below the booking, providing a quick snapshot of all payment history.
Note : Role-Based Access
- Admin/Super Admin:
- Can delete payments.
- Can download receipts.
- Staff Roles:
- Can only download receipts.
Checkout Process.
The Checkout finalizes the booking after the event is over, ensuring all dues are cleared and documentation is completed.
Checkout Conditions
- Can only be initiated on or after the booking’s end date.
- All pending payments must be cleared before proceeding.
Steps to Perform Checkout
- Verify Payment Status
- Check if any payment is still due.
- If pending, use the Advance Pay button to clear dues.
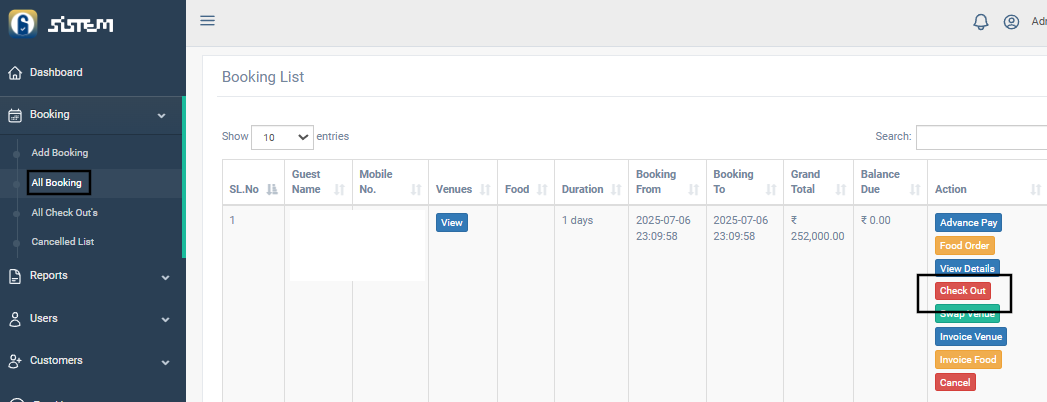
- Initiate Checkout
- Go to “All Bookings”.
- Click on the “Checkout” button in the Actions column.
- Review Booking Summary
- A summary page will display:
- Guest Details
- Booking Timeline
- ID Proof Info
- Payment Details
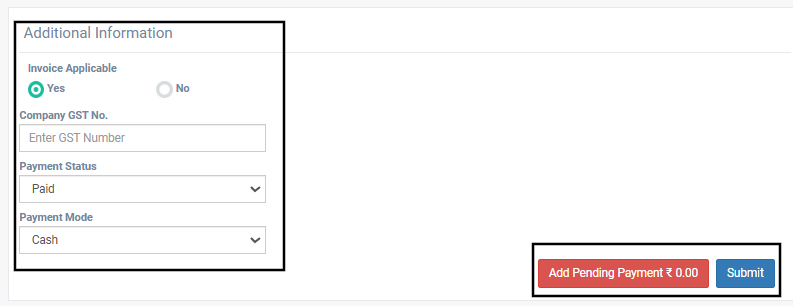
- Company-specific sections
- Indicate whether an invoice is applicable.
- Complete Final Payment (if any)
- Confirm there are no dues left.
- Click “Submit” to complete the checkout.
- Confirmation
- A final confirmation toast will appear.
- Booking will move to the “All Checkouts” section.
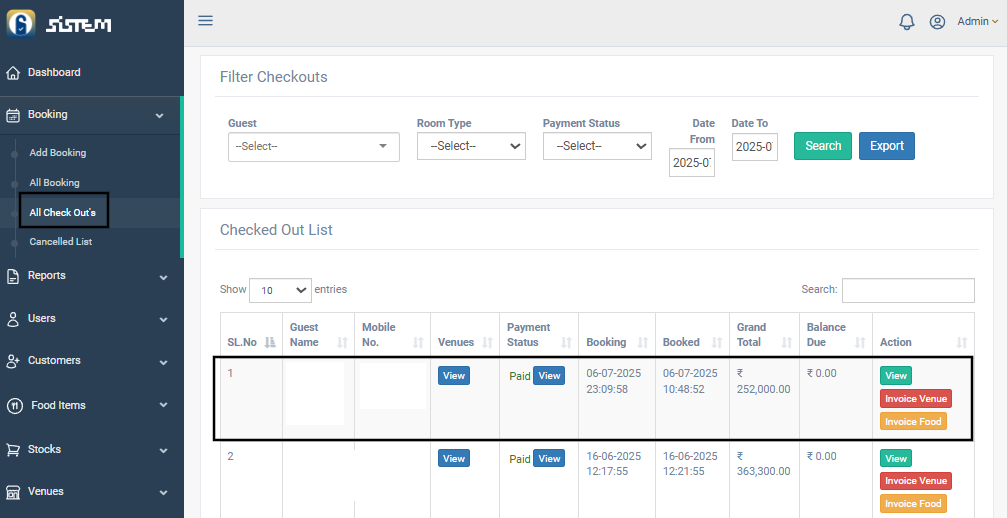
All Checkouts Section Features
- Located in the side navigation under “All Checkouts”.
For each booking, you can:
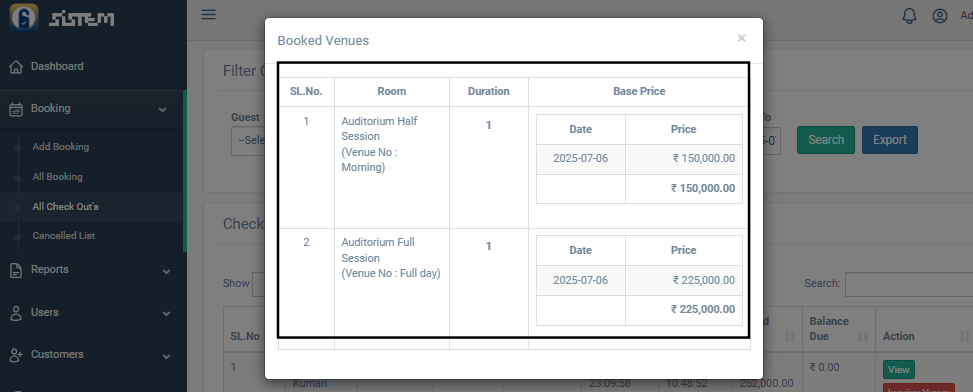
- View Summary
- View/Print Venue Invoice
- View/Print Food Invoice

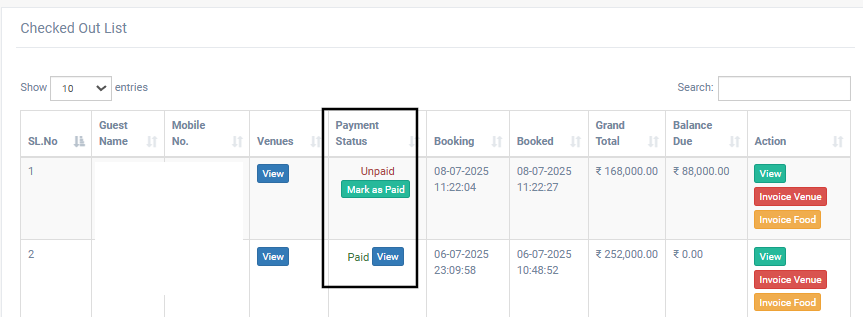
- Marking Unpaid Bookings as Paid
- If a booking is marked as Unpaid, click “Mark as Paid” to open the Advance Pay popup again.
- Once payment is submitted, the status will auto-update to Paid.
- View Buttons of Venues and Payment Status

- Filtering and additional features
- Filters: Sort checkout list by Guest Name, Venue Type, Payment Status, or Date Range.
- Export: Use the “Export” button to download the checkout list in CSV format for records or reporting.

Summary
The Advance Pay and Checkout features streamline the booking lifecycle ensuring that payments are tracked, events are completed smoothly, and proper financial and event records are maintained. Role-based permissions help secure payment actions, while filters and export options improve operational efficiency.