

Food Management Overview
This guide will help you understand how you can manage food menus, food items and food categories from a single Food section. In this section you can add, update, delete the menus, items and its categories.
The Food Module is designed to streamline how food offerings are structured, categorized, and managed. It enables easy creation, customization, and organization of all food-related services for venues or restaurants.
Food Menus: Food Menus are curated collections of food offerings tailored to specific events, cuisines, or meal types. Menus can be customized based on client preference. Each menu can include multiple food categories and items, making it easy to present and manage a cohesive food experience.
Food Category: Categories help in logically grouping food items under themes such as Starters, Main Course, Desserts, Beverages, etc. They improve user navigation and make it easier to browse or select items during the ordering process. Each category can contain one or more food items.
Food Items: These are individual dishes listed under relevant categories. Each food item contains details like the item name, description and price. Items can also be tagged for menus.
How to manage or add Food Menu
- Go to the “All Menu” section from the side navigation.
- Review the table displaying:
- Menu Name
- Number of Food Items
- Price per Plate
- Description
- Status (Active/Inactive)
- Actions (Edit/Delete)
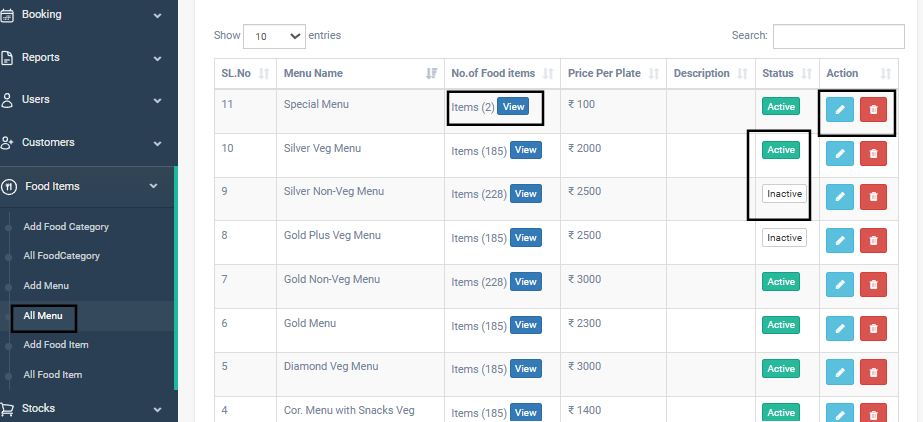
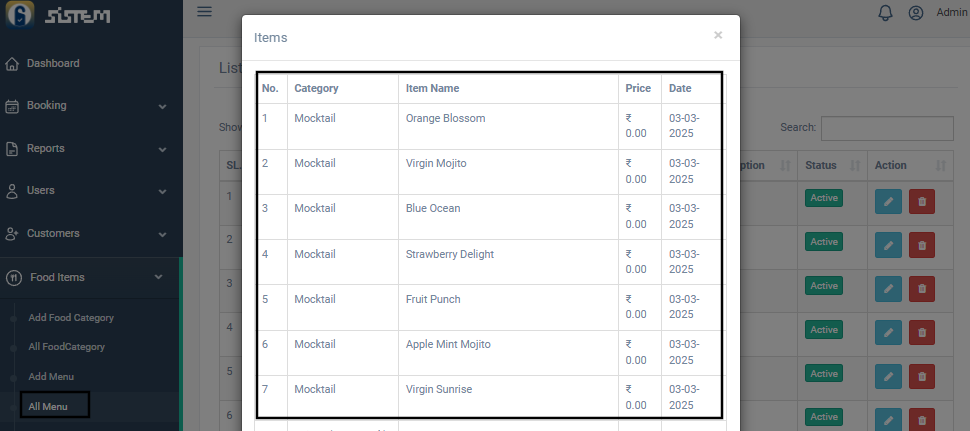
3. In the Number of Food Items column, click the “View” button to see all food items linked to that menu.
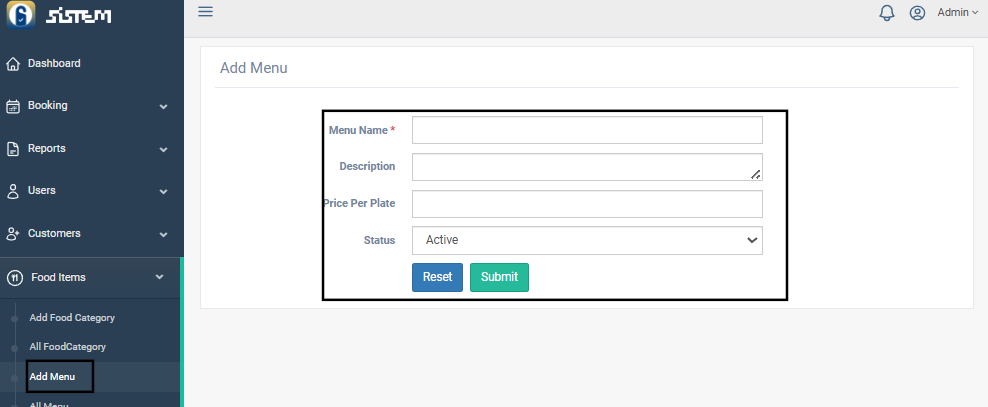
Add a New Menu
- Click on “Add Menu” from the side navigation.
- Fill in the required fields:
- Menu Name
- Description
- Price per Plate
- Status (Active/Inactive)
- Click “Submit” to save the new menu.
How to manage or add Food Categories
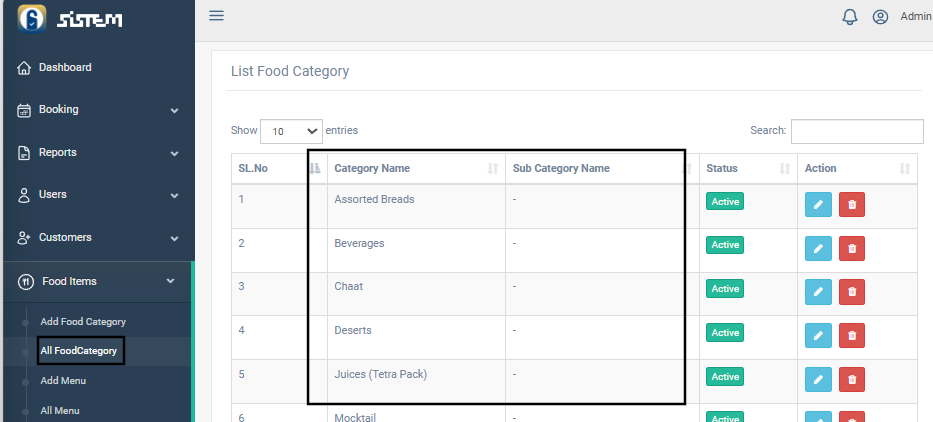
- Navigate to “All Category” from the side menu.
- The table will show:
- Category Name
- Sub-Category
- Status (Active/Inactive)
- Actions (Edit/Delete)
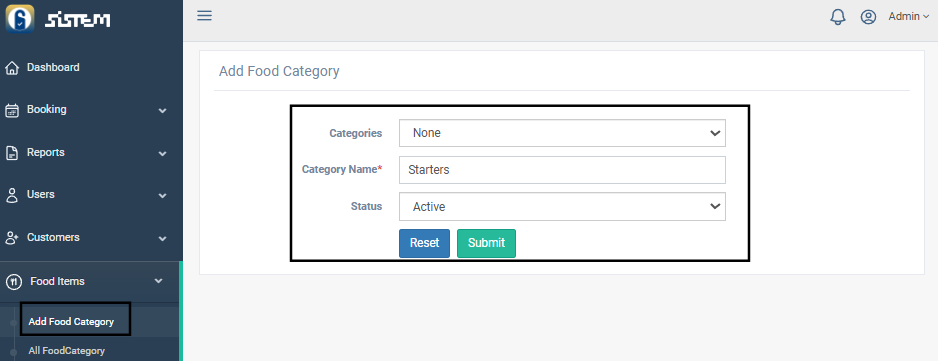
Add a New Category or Sub-Category
- Click on “Add Food Category”.
- Fill in the following:
- Category: (Leave blank if creating a new top-level category)
- Category Name: (Enter name of new category or sub-category)
- Status: Select Active/Inactive
- Click “Submit” to save.
Note:
- For new categories, leave the Category dropdown blank.
- For sub-categories, first select the parent category, then enter the sub-category name.
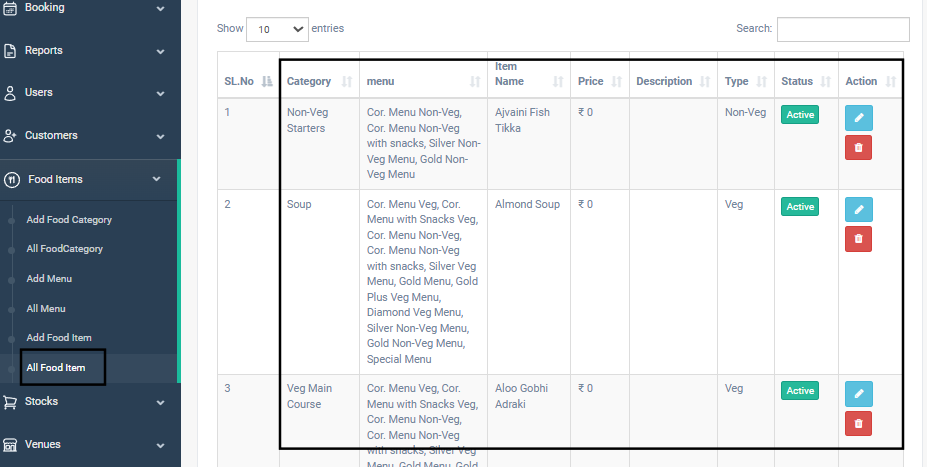
How to manage or add Food Items
- Go to the “All Food Items” section.
- View detailed information for each item, including:
- Category
- Menu(s) Tagged
- Item Name
- Price
- Description
- Food Type (Veg/Non-Veg)
- Status
- Actions (Edit/Delete)
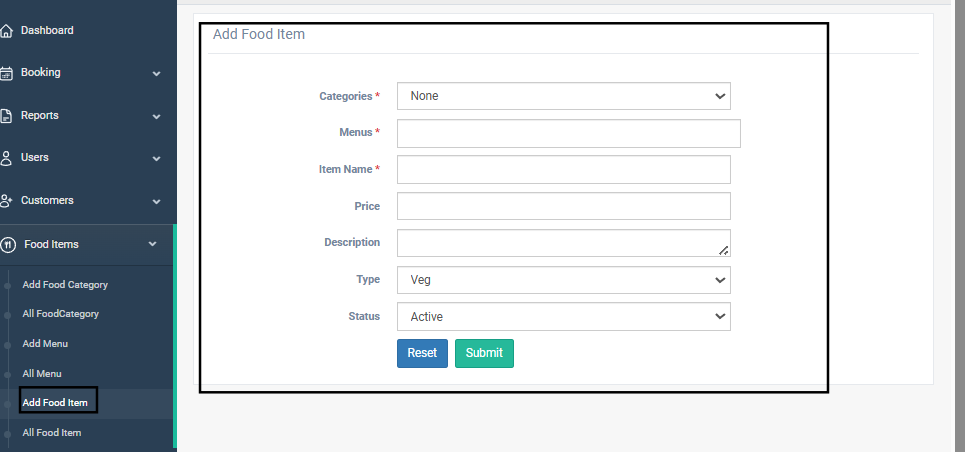
Add a New Food Item
- Click on “Add Food Item”.
- Fill in the form:
- Select Category
- Select Menu(s) the item should be tagged to
- Item Name
- Price
- Description
- Food Type (Veg/Non-Veg)
- Status (Active/Inactive)
- Click “Submit” to add the item.
Summary
The Food Management module enables admins to organize menu offerings with ease. You can:
- Create and maintain menus with customized pricing.
- Structure food options using categories and sub-categories.
- Add and tag individual food items for accurate billing and selection.
This ensures that your platform offers flexible and efficient food service management for any event.