


Turn a physical parking location into a managed operation
Creating a parking space is the next step after setting up your organization. It connects SISTEM to a real-world parking location and creates the foundation for managing its daily operations.
Each parking is set up as an independent location within your organization. You can configure its location, type, operating hours, amenities, images, and assigned manager.
After the parking is created, you can continue with the operational setup, such as parking rates, passes, facilities, and other settings.
What is Parking in SISTEM?
A Parking represents a real-world location where vehicles are parked and managed.
It can be:
- Standalone parking lots
- Hotels and resorts
- Offices and commercial buildings
- Airports and transit hubs
- Stadiums, arenas, and event venues
- Apartments and gated communities
- Industrial and warehouse locations
- On-street and smart city parking
- Retail stores, malls, and shopping complexes
- Coastal zones, harbours, and marinas
Each parking is managed as a separate operational unit within your organization.
This means you can configure different parking locations based on their individual requirements.
What can you configure for each Parking?
Each parking can have its own:
- Parking Details
Name, description, and parking type.
- Location
Physical location and registered address.
- Amenities
Services and amenities available at the parking.
- Operating Hours
Working days and hours of operation.
- Images
Photos that help identify and present the parking.
- Parking Team
A team members responsible for managing the parking.
- Vehicles Rates and Passes Rates
Pricing and pass settings configured after the parking is created.
- Facilities
Additional services available at the parking.
This separation allows an organization to manage different parking locations with different configurations while keeping them under the same organization.
Before You Create a Parking
Make sure you have:
- Registered your SISTEM organization.
- Completed the organization Setup Guide.
- Administrator access to the organization.
- The basic information about the parking location.
Once these are ready, you can create a parking lot from the Parking section.
Steps to Create Your Parking
SISTEM will take you through a step-by-step setup flow.
Step 1: Login to your Organization account and Open Parking Lot
Login to your organization account and open the parking lot to initiate creation of parking.
Understand that only Organization admins or organization managers have access to create parking.
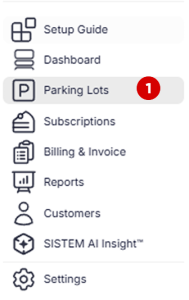
Step 2: Click on Add Parking
In Parking lot tab, click on add parking to initiate the process

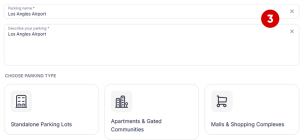
Step 3: Add basic parking details and choose parking type
At this stage, add the parking name, parking description and choose the parking type whether its standalone, airport, mall etc
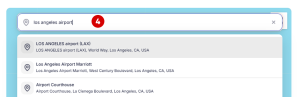
Step 4: Select the Parking Location
Set the physical location of the parking using the map.
Select the location that represents where the parking operates.
This location information can be used to identify the parking and support location-based operations.
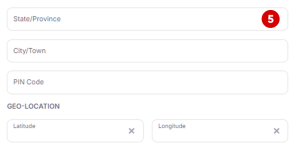
Step 5: Add the Registered Address
Enter the official address of the parking.
Make sure the address is accurate because it may be used in parking information, documents, and customer-facing details.
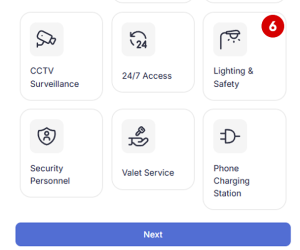
Step 6: Add Parking Amenities
Select the amenities available at the parking such as Wi-Fi, Fire safety measures, Valet service or Other available amenities
These details help users understand what is available at the parking location.
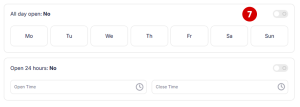
Step 7: Set Operating Hours
Define when the parking operates.
Set the Working days, Opening time and Closing time
These settings define the regular operating schedule for the parking.
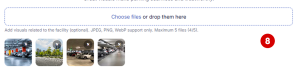
Step 8: Add Parking Images
Upload images of the parking location.
You can use images to help users identify the parking and understand the location before visiting.
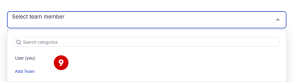
Step 9: Assign a Parking Manager
Assign a team member who will manage the parking.
If the required person is not already part of your organization, you can add a new team member during this step.
The assigned manager can then access the parking based on their role and permissions.
Step 10: Review and Go Live
Review all the information you have entered before creating the parking.
Once everything is correct, select Go Live to create the parking.
Important Note
Creation of parking doesnt mean you can now start the operations as at this stage you just build a structure of your parking added details.
Now you need to complete the Parking setup by adding vehicles rates, passes rates and facility rates. You need to setup the team of operators, accountants or other team members and assign them parking level access
You need to review the taxes and payment option which by which you will accept the payments from your customers.
After Creating Your Parking
Creating the parking completes the basic parking setup, but your parking is not fully configured for daily operations yet.
The next step is to configure the operational settings required to run the parking.
Depending on your parking setup, you may need to:
- Define parking rates
- Configure vehicle types and capacity
- Enable parking passes
- Configure facilities and services
- Set up entry and exit methods
- Configure payment options
- Connect supported devices or integrations
- Assign additional team members
These settings determine how the parking operates on a day-to-day basis.
Learn more how to setup parking
Things to consider
A parking lot is managed as a separate operational entity within your organization. Most parking-specific settings can be configured independently for each location.
Some organization-level settings may be available as defaults when setting up a parking. For example, the organization timezone can be used for the parking.
Review the organization settings before creating your parking to make sure the required defaults are already configured.
How is Subscription assigned?
When you create a parking in SISTEM, it is automatically assigned to the default subscription plan and the trial period starts. You can use the available SISTEM Parking features during the trial period. Once the trial period ends, you need to upgrade the parking subscription to continue using SISTEM Parking and its operations.
Know more about Subscription Plans
Learn how to upgrade your parking subscription
Read next
After creating your parking, prepare it for live operations.