



















































































Facility Rates is where you configure pricing for the services your parking offers, beyond vehicle parking itself.
Learn more about what facilities are and the difference between predefined and custom ones.
How Facility Rates Are Structured
Each facility whether predefined or custom includes a name, description, active dates, capacity, tax, status, a pricing type, and its own pricing tiers. You can add a facility in one of two ways: choosing a ready-made type SISTEM already provides, or building one from scratch for something specific to your location.
Setting Up a Facility
Step 1: Go to Facility Rates
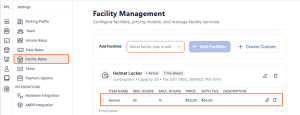
Navigate to Settings → Facility Rates. This opens Facility Management, where all of your parking’s facilities are configured.
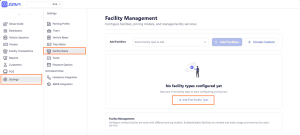
Step 2: Choose a predefined type, or create a custom one
To choose predefined facility, check the available facilities in dropdown such as Helmet Locker, Locker Storage, Refreshments, or Valet Parking Service etc
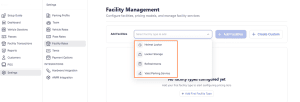
Click on Custom to define a new facility at your parking one from scratch.
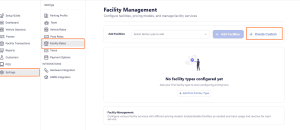
Step 3: Fill in the facility details
For a predefined facility, the Facility Name is filled in automatically; for a custom one, you’ll enter it yourself. Either way, add a Facility Description, a Start Date (and an End Date if the facility is only offered temporarily), and a Capacity Limit if it applies. Set Status to Active once it’s ready to go live.
Step 4: Apply tax and choose the pricing type
Select the applicable tax under Choose Tax. Predefined facilities come with a suggested Pricing Type already in place; for custom facilities, you choose from Flat Rate, Time-Based, Unit-Based, or Energy-Based, based on how the service is actually delivered.
Step 5: Set the service flow
Decide whether the facility is One-Time Usage — completed in a single action, with no duration tracked — or requires a check-in and check-out, for services where something is held or used over time. This applies the same way whether the facility is predefined or custom.
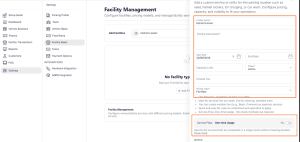
Step 6: Save
Save the facility. It now appears in your facility list, ready for pricing tiers.
Step 7: Add photos (optional)
Custom facilities also support photo uploads useful for services that benefit from a visual, like event tickets or rentals.
Adding Pricing Tiers
Once a facility is saved, define how it’s actually priced through tiers. The fields available depend on the pricing type you chose:
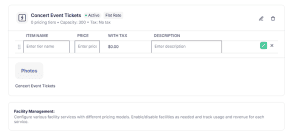
- Flat Rate tiers use Item Name, Price, and Description — useful for itemized options, like different ticket categories for the same facility.
- Time-Based tiers use Min. Hours, Max. Hours, and Unit Type (Hourly or Fixed) — the same structure used for vehicle rates.
Step 1: Open the facility
Select the facility you want to configure pricing for.
Step 2: Click Add Tiers
Step 3: Fill in the tier details
Step 4: Confirm
Save the tier, and repeat to add as many tiers as the service needs.
Managing Facility Rates Over Time
Facility rates aren’t fixed once configured admins and managers can edit details, activate or deactivate a facility, or add new ones at any time. Changes apply to future usage only, without affecting anything already recorded.